Edit an artist
Most metadata in Stillwater comes from providers. Sometimes you want to override a value, pin one in place, or curate something the providers don't supply. This page covers the manual-edit paths.
Edit a single field
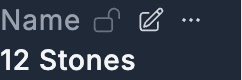
Each field has its own row of small icons next to its label: an open-lock toggle, an edit pencil, and a … overflow menu. The pencil is the entry point for editing.
- Open the artist's page.
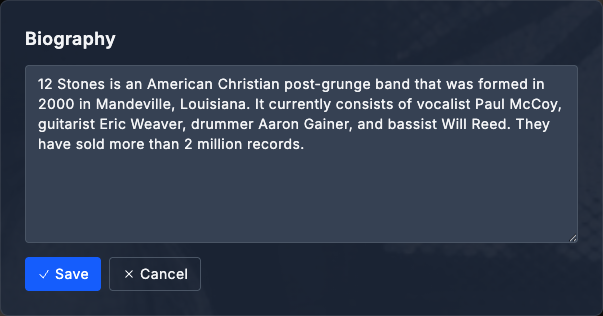
- Click the pencil icon next to the field you want to change. Biography and the tag groups (Genres, Styles, Moods) put the pencil in the card header; Detail-panel fields (Name, Born, Type, etc.) put it next to the field label.
- The field swaps to an inline editor. Type the new value.
- Press Enter (or click Save) to commit, or Esc / Cancel to back out.
The field saves immediately -- no separate "Save changes" button at the page level. The change appears in the artist's history alongside provider attributions.
Editing list fields
Genres, styles, and moods are list fields. Their inline editor lets you type a new value into a text input to add it; click the X on an existing chip to remove one. The order matters for some platforms (the first genre is often the "primary" one).
Lock the artist
Locking the artist means: future automated runs (provider refreshes, rule fixers) skip this record entirely. The big switch.
- On the artist's page, click the lock button (next to the name).
- The lock toggles. The button reflects the new state, and a small lock indicator appears next to fields the lock now protects.
When locked, Stillwater also adds <lockdata>true</lockdata> to the NFO file the next time it writes one. That asks platforms (Kodi, Emby, Jellyfin) to leave the file alone too.
To unlock, click the lock button again.
Lock a single field
Sometimes you want most of an artist's metadata to refresh from providers, but two or three fields you've curated should stay put.
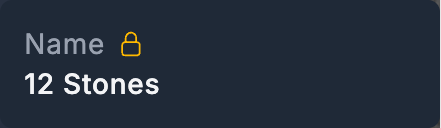
- On the artist's page, find the field you want to pin. A small open-lock icon (gray) sits next to its label.
- Click the lock icon. It immediately switches to a closed amber lock; the field is now skipped on future refreshes.
- While locked, the field's edit pencil and overflow menu disappear -- you can't accidentally change a pinned value. Click the closed lock again to unlock.

 Hover or focus to lock
Per-field locks are independent of the whole-artist lock. You can have an unlocked artist with three pinned fields, or a locked artist with the lock removed from one field (rarely useful, but supported).
Reorder fanart
When an artist has multiple fanart images, the first one is "primary" -- it's the one shown in slideshow positions where only one fanart fits.
- Open the artist's Images tab.
- Hover (or focus) any non-primary fanart in the gallery. A small star button appears on the overlay. Click the star to promote that fanart to primary; the others keep their existing order behind it. (Clicking the thumbnail itself opens the lightbox for full-size viewing -- the star is the promotion control.)
- For finer rearrangement, open the image search page (the same place you fetch new fanart) and use the up/down buttons in the fanart gallery there. The order saves immediately and the files on disk are renumbered to match.
Renumbering follows the platform profile's convention -- so the resulting order yields fanart.jpg, fanart2.jpg, fanart3.jpg for Emby/Jellyfin, or fanart.jpg, fanart1.jpg, fanart2.jpg for Kodi.
Manually upload an image
When providers don't have what you want, upload directly.
- Open the artist's Images tab.
- On the slot you want to fill (thumb / fanart / logo / banner), click Upload.
- Drag a file onto the drop zone, or click to file-pick.
- (Optional) Crop the image in the in-browser cropper before saving.
- Click Save.
Uploads up to 25 MB are accepted.
Add or change a provider ID
Most provider IDs are discovered automatically as Stillwater queries providers and follows links between them. When you need to set one manually:
- Open the artist's page.
- Find the provider ID under the External IDs section (MusicBrainz, AudioDB, Discogs, Wikidata, Deezer, Spotify).
- Click the value to edit it.
- Paste the ID and press Enter to save.
Setting an ID does not trigger a refresh on its own -- the next refresh will use the new ID. To pull updated data immediately, click Refresh after saving.
Discard accidental edits
There's no global "undo." Two ways to recover:
- Refresh -- pulls fresh values from providers, overwriting your unsaved changes (only on unlocked fields). Use when the original came from providers anyway.
- Snapshot restore -- if a snapshot exists from before the edit (Stillwater takes one before fix-all runs), the snapshot panel lets you restore it.
What edits don't do
- They don't write the NFO file immediately. The artist record updates; the NFO is rewritten on the next save action that touches disk (or by a fixer). The "Save NFO" button on the artist page forces an immediate write.
- They don't touch images. Field edits and image edits are independent.
- They don't broadcast to connected platforms automatically. The platform sees the change at its next metadata refresh, which it controls. Some platforms can be poked via webhook.
See also
- Field locks for the bigger picture on the two lock layers plus the library-wide NFO lockdata switch.
- Refresh metadata when you want providers to overwrite unlocked fields.
- Fetch and crop images for image-specific workflows.